Product Documentation
This guide helps users make the most of our product, with instructions tailored to individual roles. Access to features depends on your organization’s subscription plan (Trial, Starter, or Stable). Plan-specific features will be clearly indicated.
1. General Usage (All Roles)
1.1. Getting Started
-
Login:
-
Navigate to the app login page.
-
Enter your registered email and password.
-
Click “Login.”
-
-
Logout:
-
Click the “Logout” icon (usually a door with an arrow) in the top right corner to securely end your session.
-
First Time Login?
When logging for the first time, it is always recommended to update your temporary password provided by Admin. This ensures that your account doesn’t get compromised.
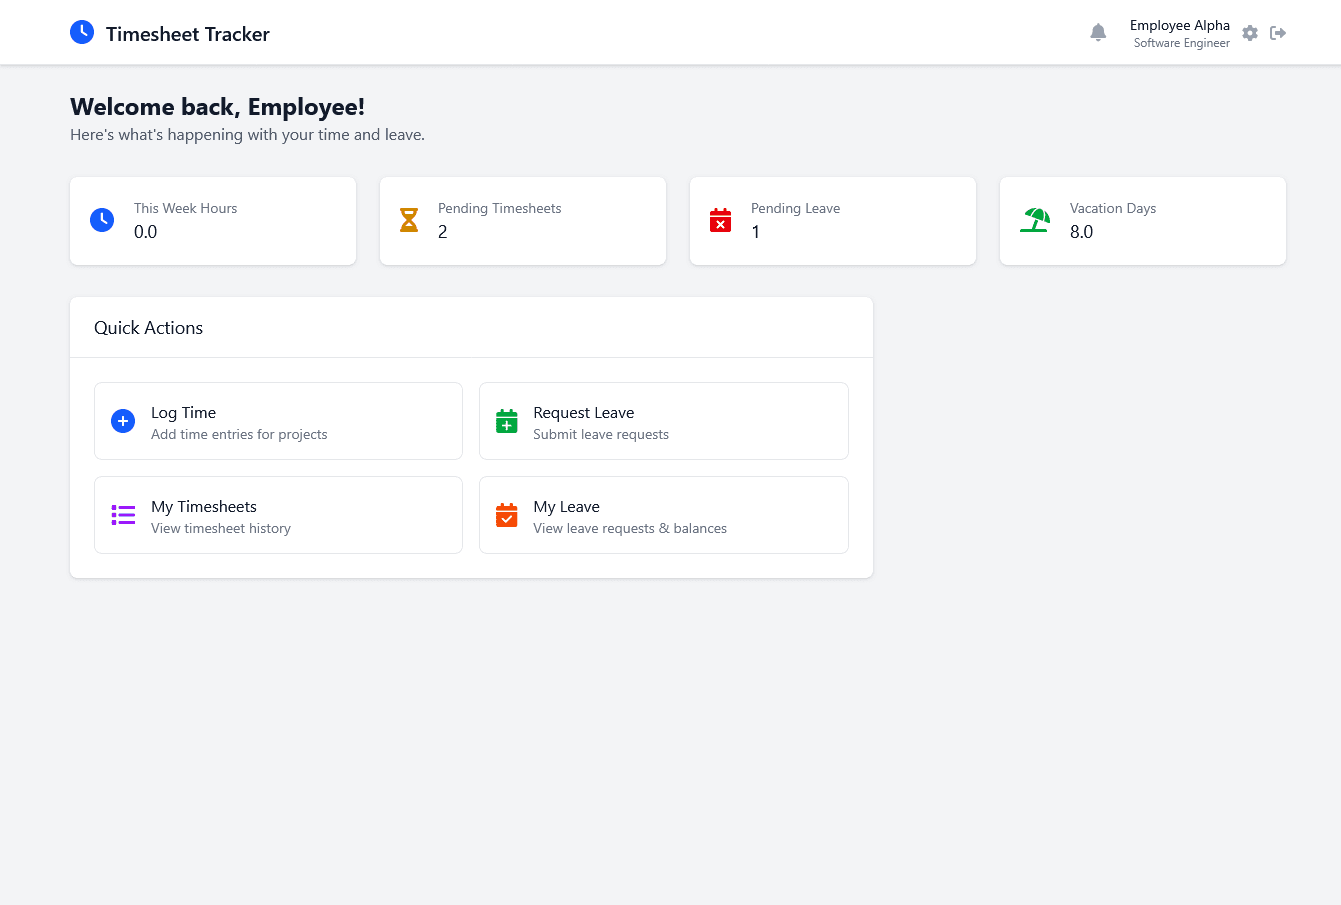
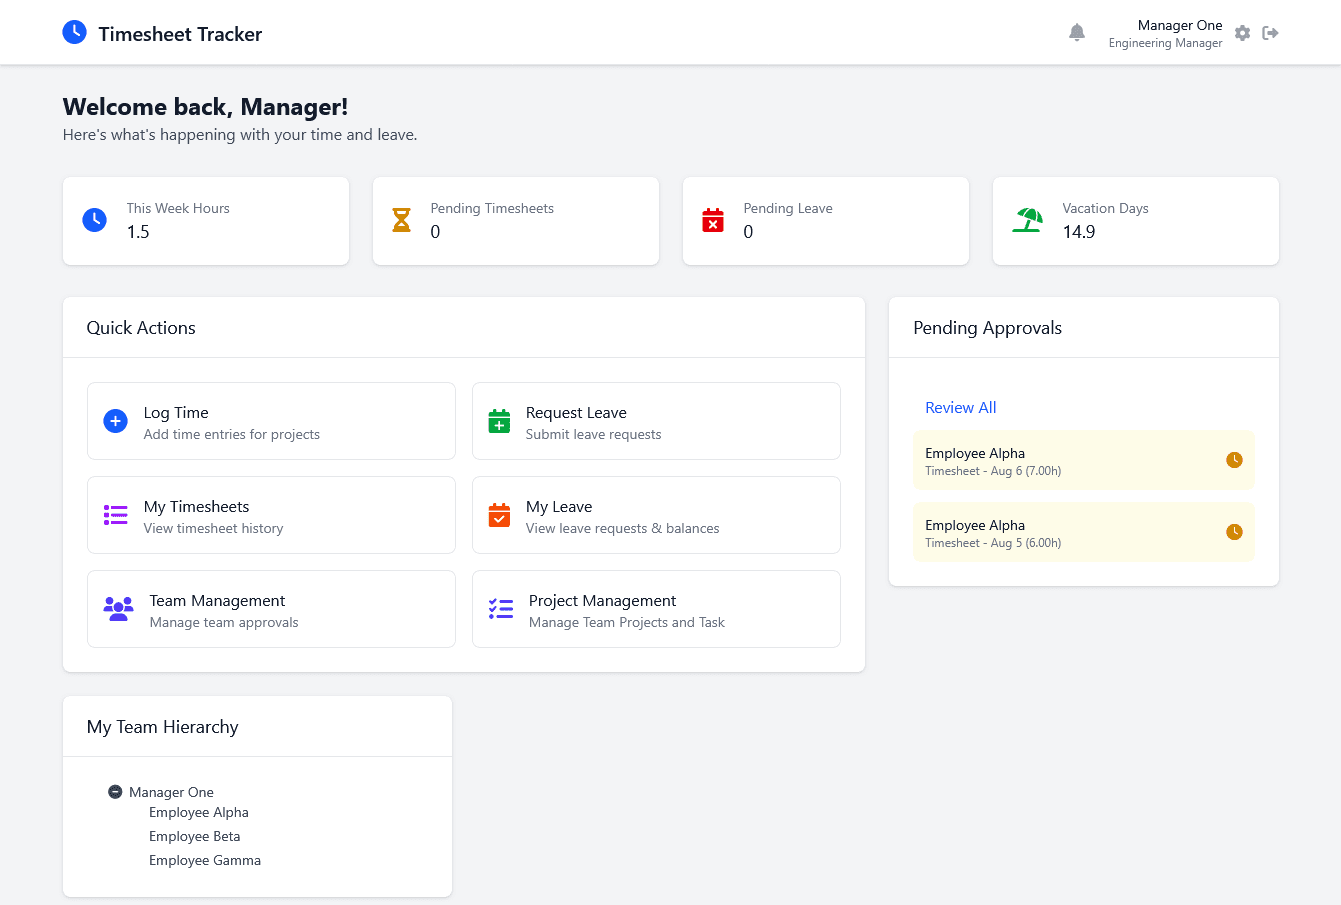
1.2. Dashboard Overview
-
Upon logging in, you arrive at your personal dashboard with summaries such as:
-
Pending Approvals
-
Vacation Days
-
Recent Time Entries in Hours
-
-
Use the available widgets to access various sections of the app.
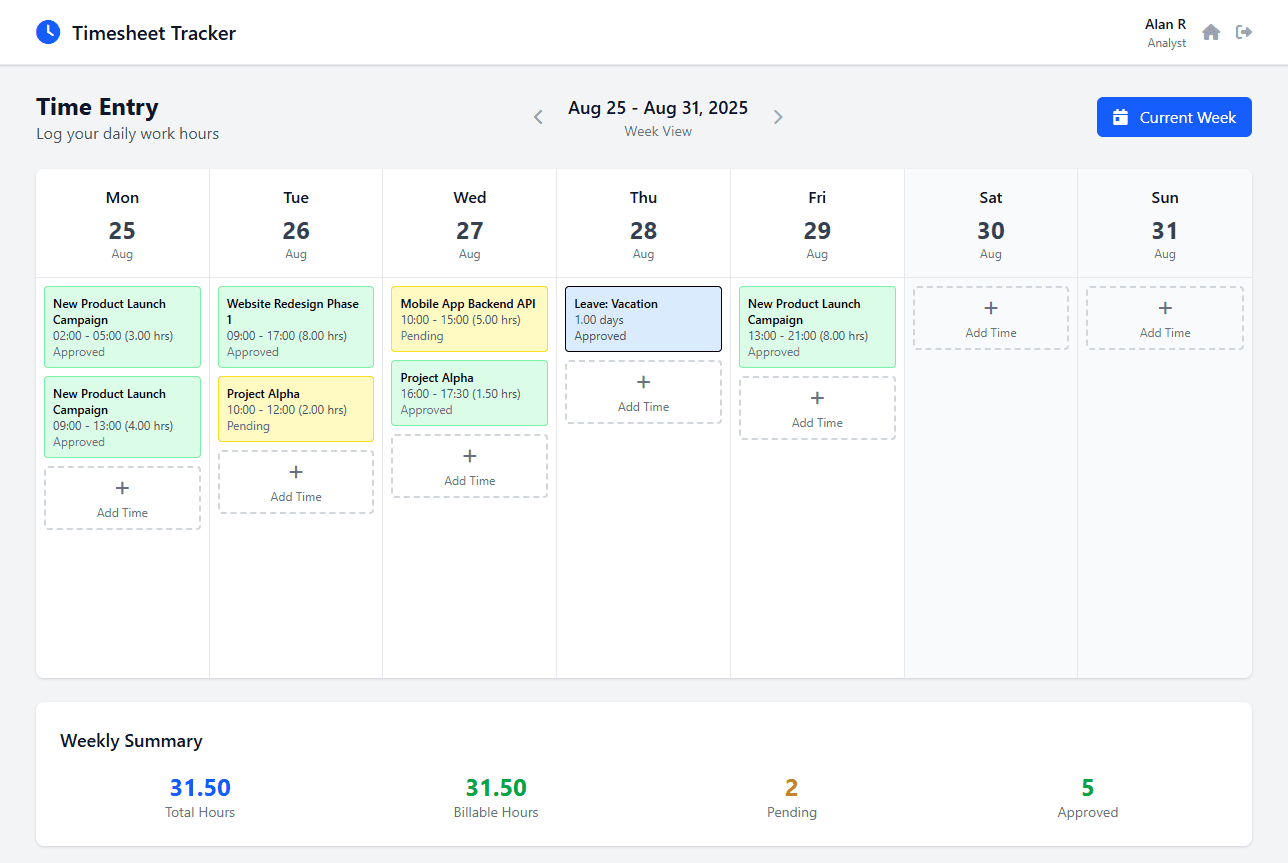
1.3. Logging Time
-
Click on the “Log Time” from the list of available widgets.
-
Log your daily work hours against specific projects and tasks.
-
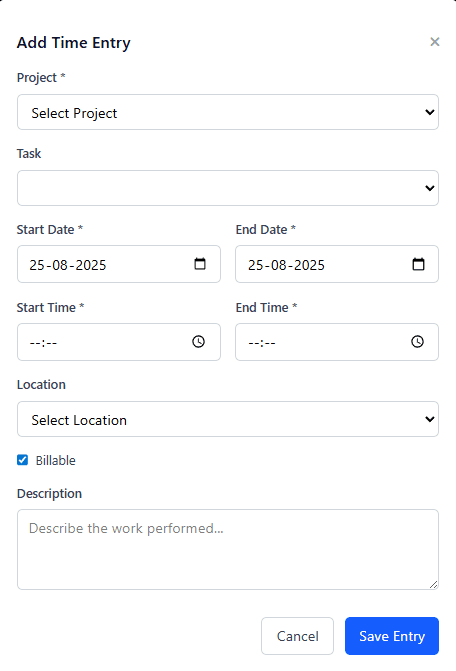
Select date and click “Add Time”.
-
Enter project, task, time, billable status, and description.
-
Click “Save Entry.”
-
Withdraw pending timesheet when not ready.
1.4. Request Leave
-
Click “Request Leave.”
-
Fill in leave type, dates, and reason, then submit.

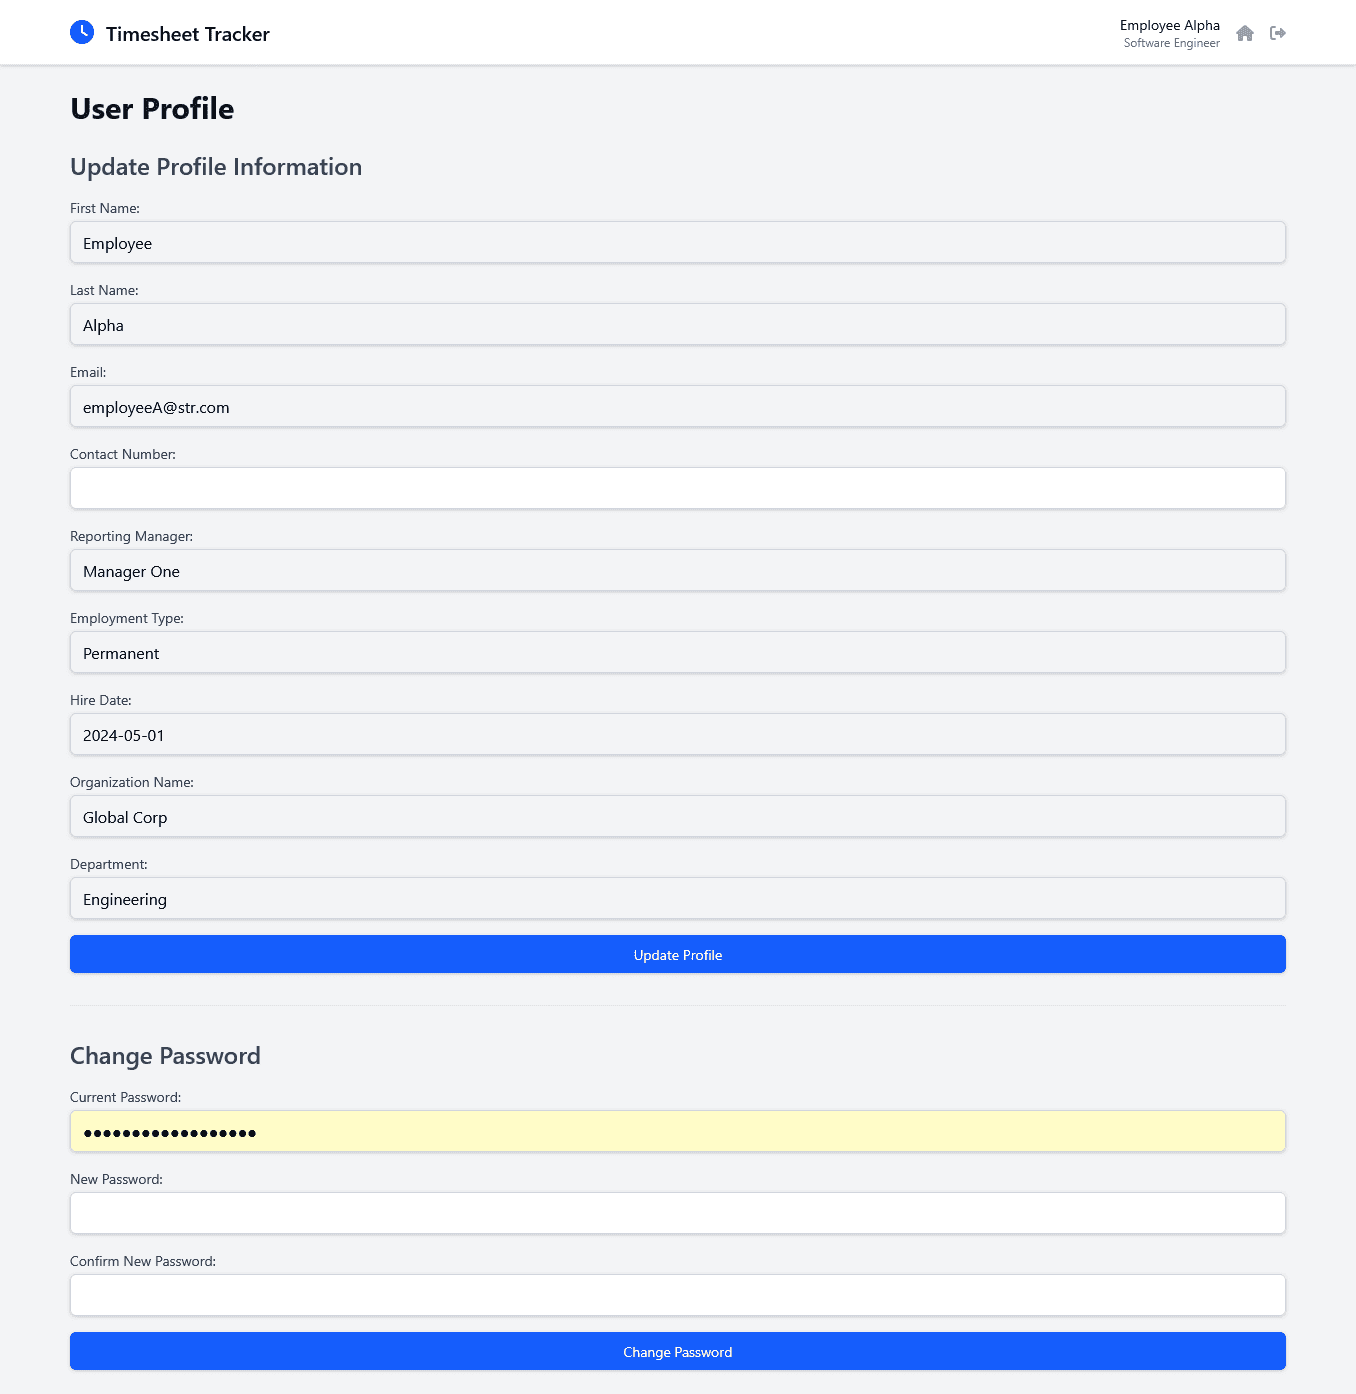
1.5. Profile Management
-
Click on the “User Settings” link (located in the header menu bar).
-
User can only update their Contact number on this page. To update other information related to your profile, kindly contact your Org Administrator.
-
Click “Update Profile” to save changes.
-
For password changes, enter your current and new password, then click “Change Password.”
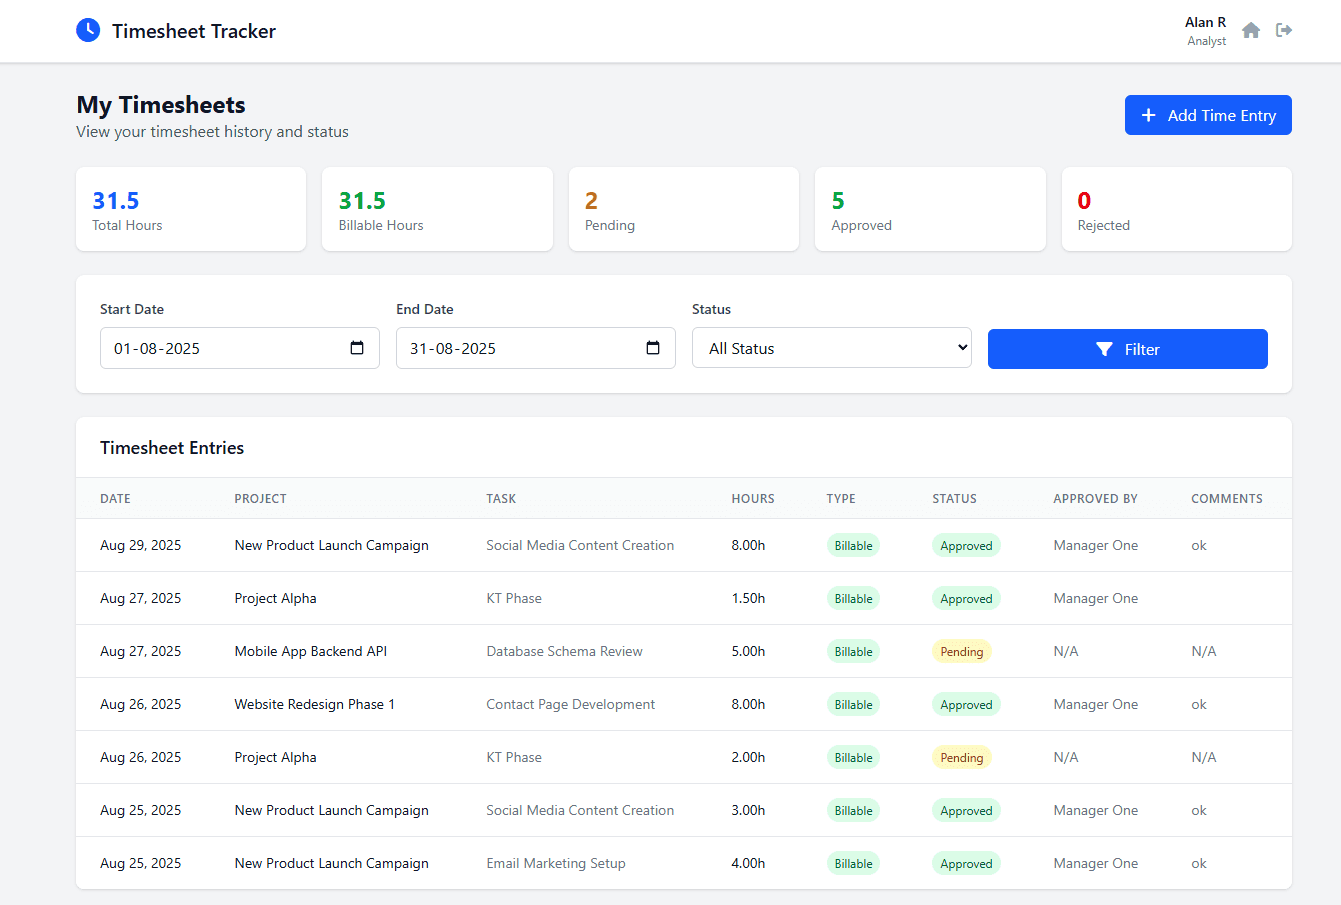
1.6. My Timesheets
-
Click “My Timesheets” from the available widgets.
-
Review the table showing your time entries (project, task, hours, status).
-
Use filters like “Start Date” and “End Date” for specific records.
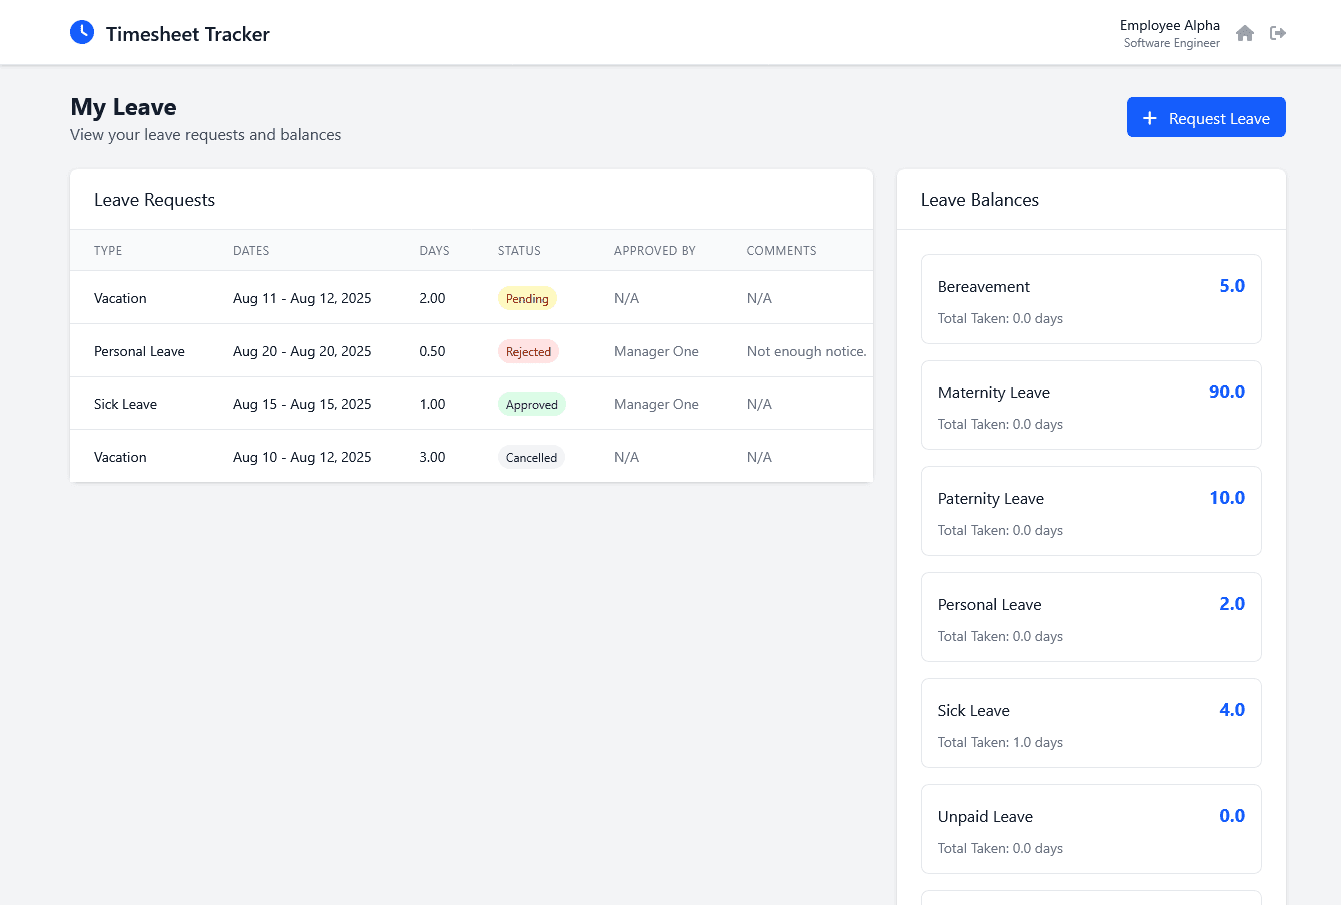
1.7. My Leave
-
Click “My Leave” from the available widgets.
-
View your available leave balances.
-
Track the status of submitted leave requests or withdraw pending leave applications.
2. Admin Documentation (Admin Role)
As an Admin, you have full control over your organization’s settings, users, projects, and more. Access the Admin Panel from your dashboard.
Getting Started for Org Admins:
If you are logging for the first time as an Admin of your organization account, make sure that you have setup and configured different Users, Projects, Tasks, your Organization Detail, yearly planned Holidays, default Leave types and Leave Configurations.
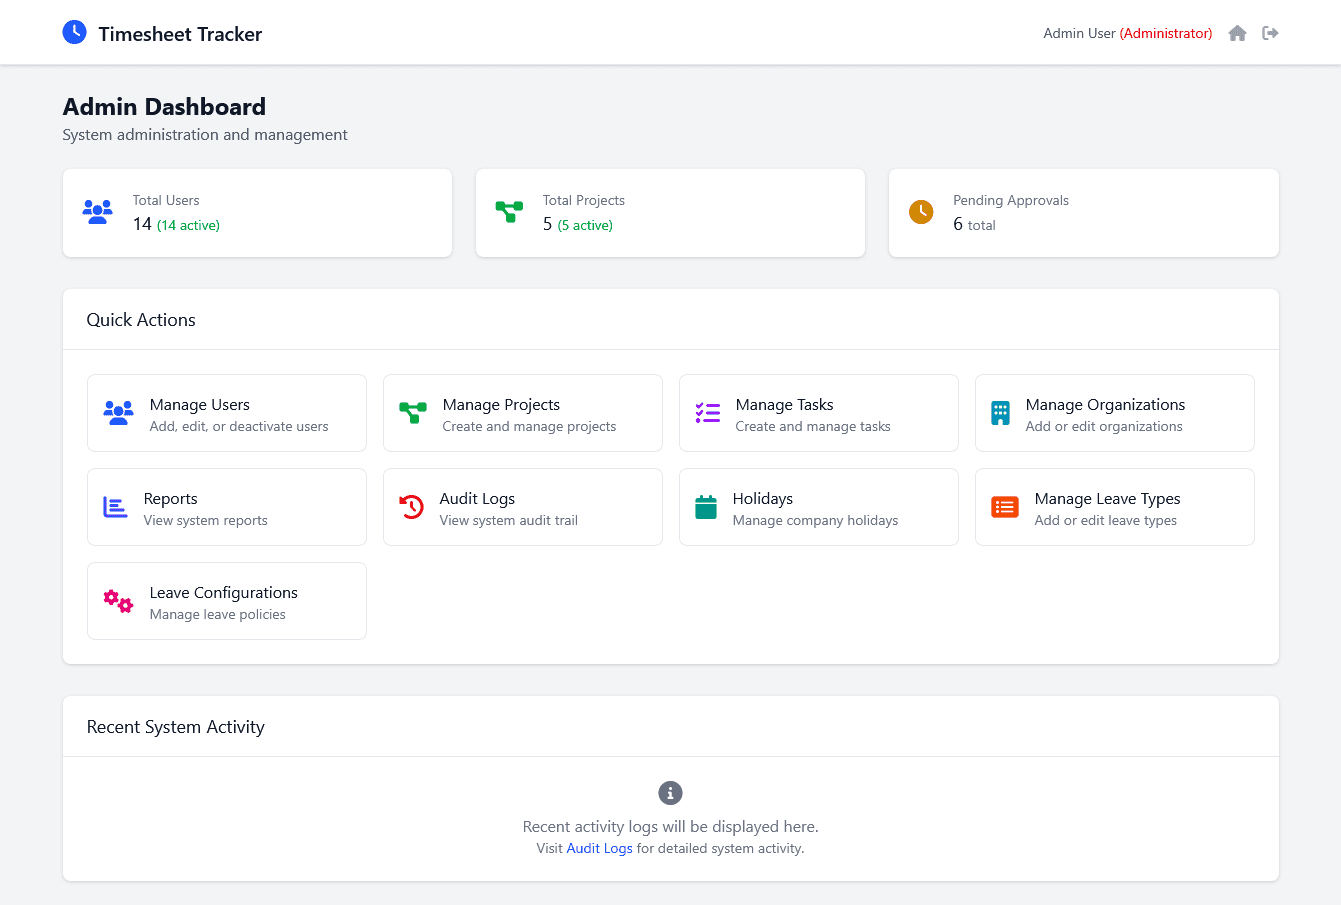
2.1. Admin Panel Overview
The Admin Panel provides centralized control over the application’s core functionalities.
2.2. User Management
Manage all users within your organization, including adding new users, editing profiles, and resetting passwords.
- Click “Manage Users” in the Admin Panel.
-
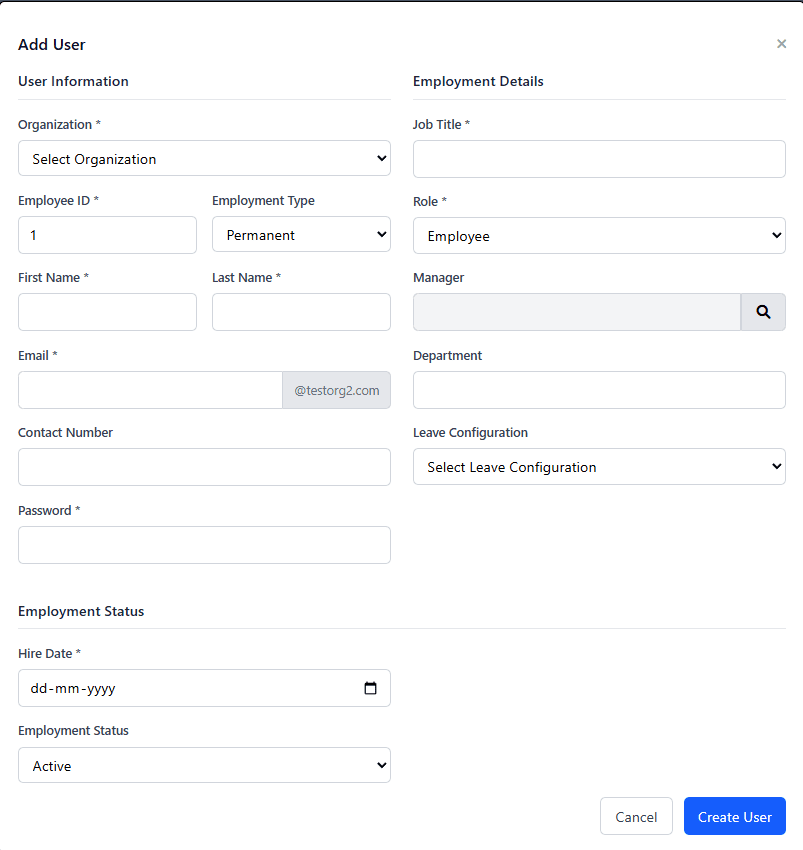
Add New User:
-
Click “Add New User.”
-
Enter user details (Employee ID, Name, Email, Role, etc.).
-
Assign a temporary password.
-
Click “Create User.”
-
Plan Restriction:
Starter Plan: Limited to 25 active users. If you reach this limit, the “Add New User” button will be disabled, and a message will indicate the limit has been reached.
Trial or Stable Plan: Unlimited active users.
-
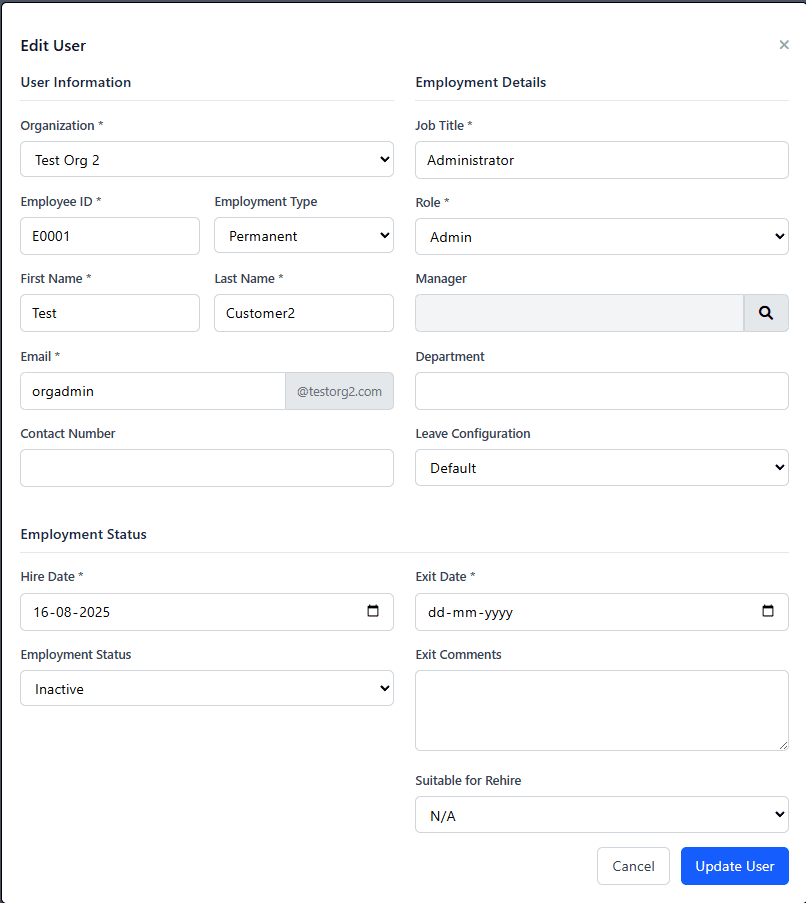
Edit User:
-
Locate and edit user details, then click “Update User.”
-
-
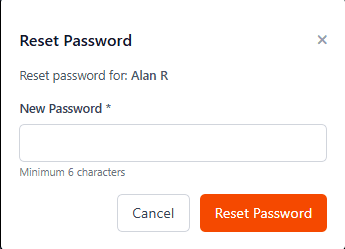
Reset Password:
-
Click “Reset Password,” enter new password, and confirm.
-
-
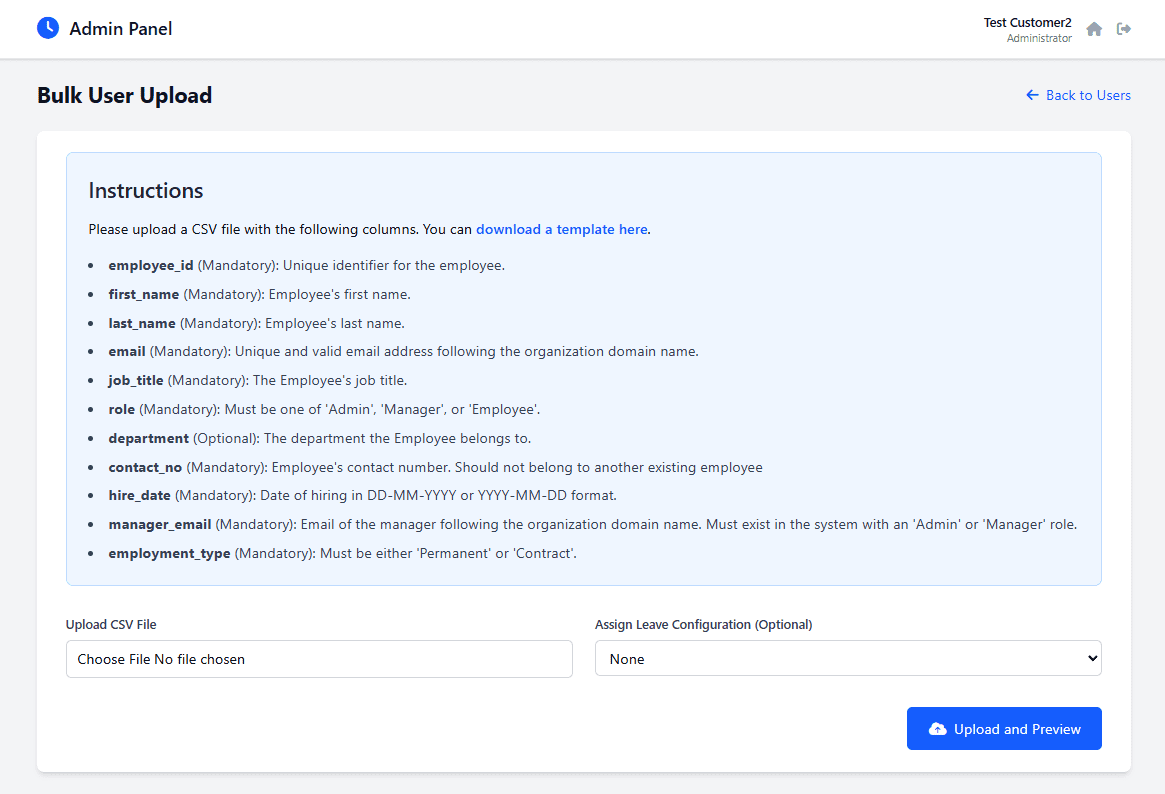
Bulk Upload:
-
Click “Bulk Upload Users,” follow the instructions on the page.
-
Plan Restriction:
Starter Plan: Not available. The “Bulk Upload Users” button will be disabled.
Trial or Stable Plan: Available for quick and efficient user onboarding.
2.3. Project Management (Admin)
Create and manage all projects within your organization. Projects created by an Admin will be visible to every employee in the organization. Projects which are not created by you will be available as read-only.
- Click “Manage Projects” in the Admin Panel.

-
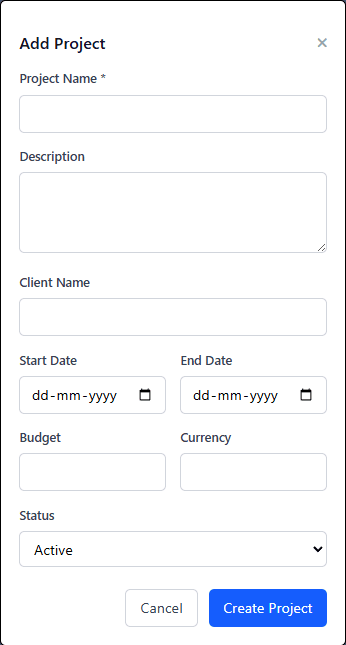
Add Project:
-
Click “Add Project,” provide details, and click “Create Project.”
-
Plan Restriction:
Starter Plan: Limited to 5 active projects. If you reach this limit, the “Add Project” button will be disabled.
Trial or Stable Plan: Unlimited active projects.
-
Edit Project:
-
Locate and update project, then click “Update Project.”
-
-
Manage Tasks:
-
Click “Manage Tasks” associated with a project.
-
2.4. Task Management (Admin)
Create and manage all tasks associated with projects. Tasks associated for any project which are created by Admin will be visible to every user in the organization. Tasks which are not created by you will be available as read-only.
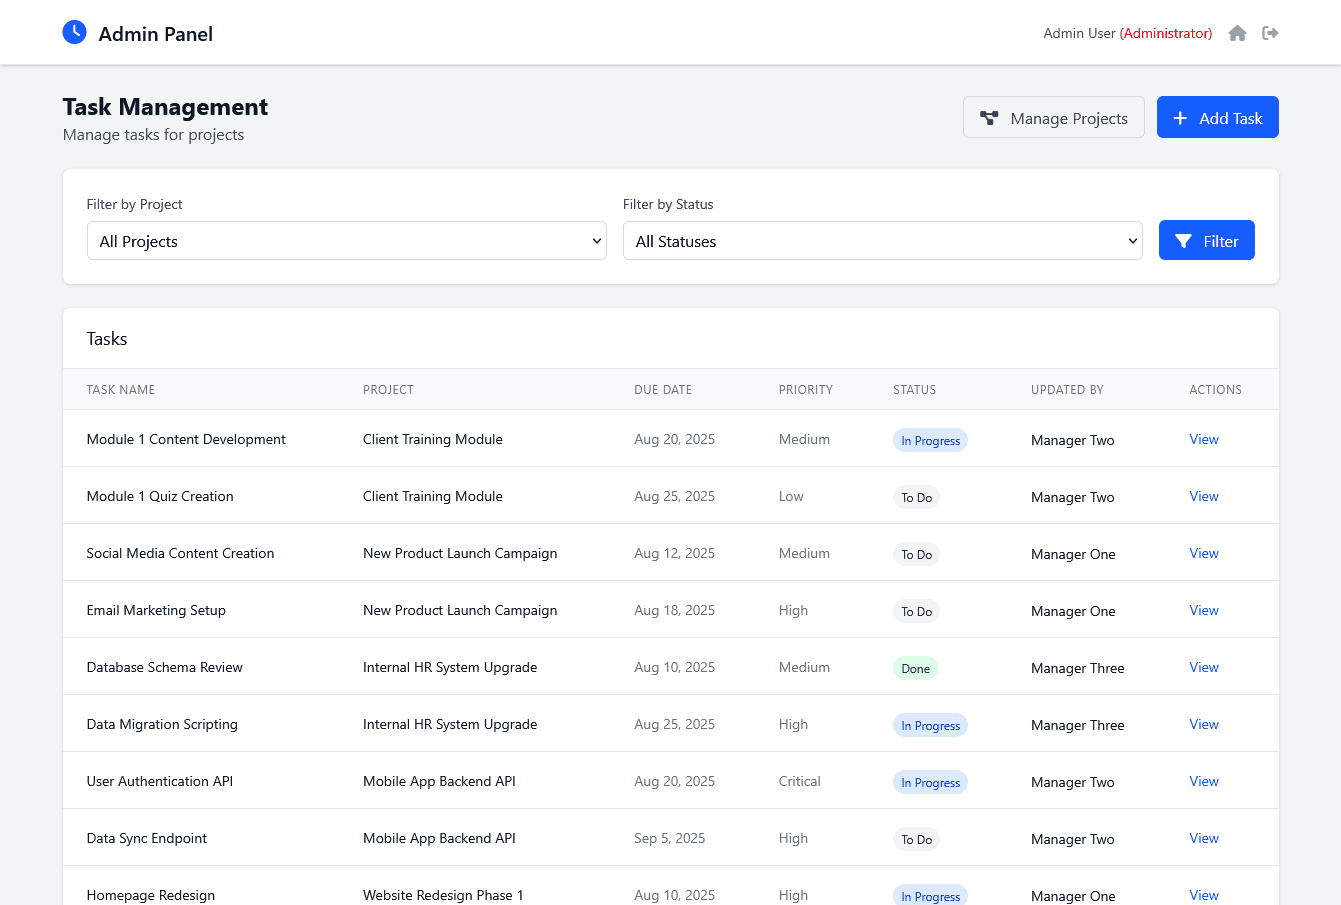
- Click “Tasks” in the Admin Panel.
-
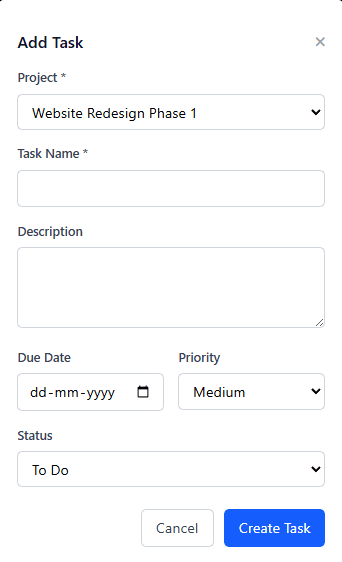
Add Task:
-
Click “Add Task,” select project, enter details, click “Create Task.”
-
Plan Restriction:
Starter Plan: Limited to 15 active tasks. If you reach this limit, the “Add Task” button will be disabled.
Trial or Stable Plan: Unlimited active tasks.
-
Edit Task:
-
Locate and update task, click “Update Task.”
-
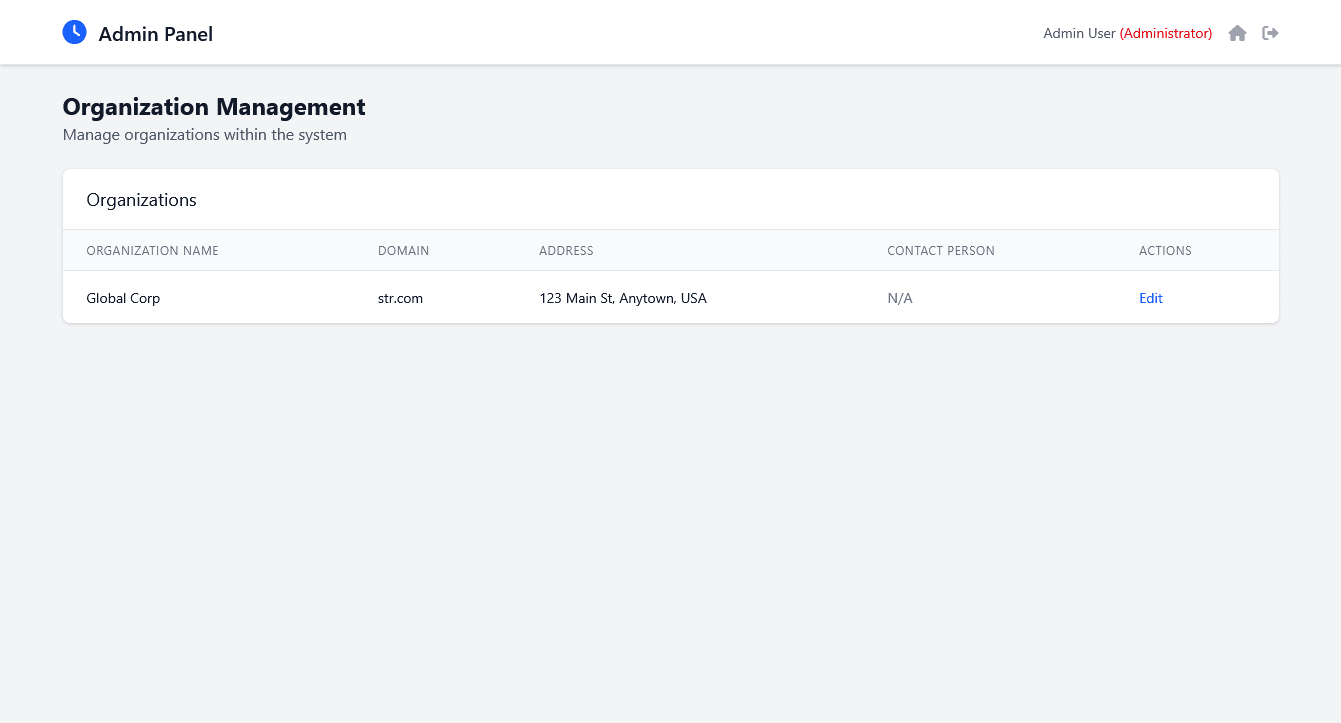
2.5. Organization Management
Manage your organization’s contact details.
-
Click “Organization Management” in the Admin Panel.
-
Click “Edit” to update details and “Update Organization” to save.
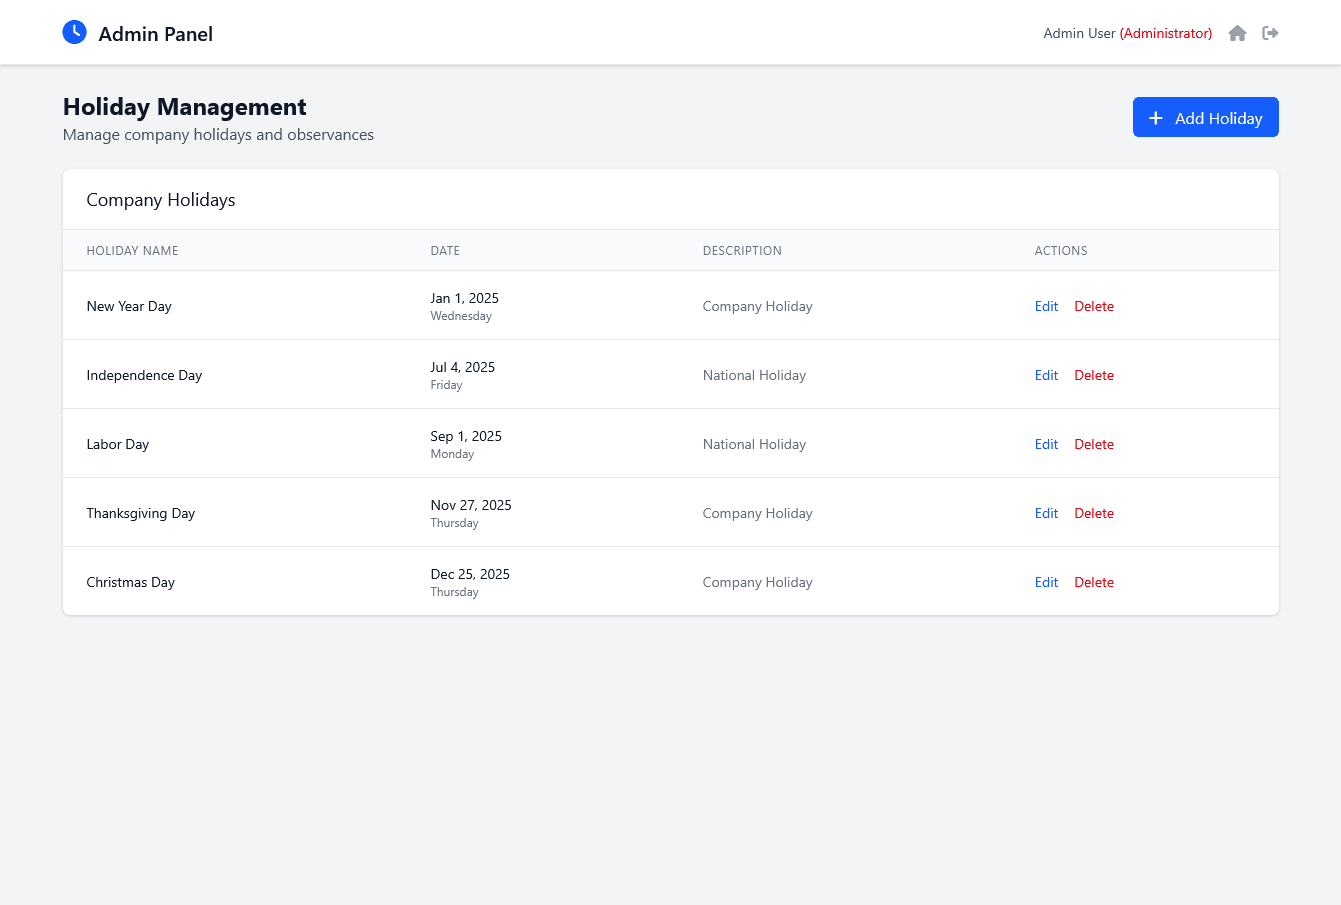
2.6. Holiday Management
Define and manage company-wide holidays.
-
Click “Holidays” in the Admin Panel.
-
Add: Click “Add Holiday,” enter details, and “Create Holiday.”
-
Edit: Click “Edit,” modify, and save.
-
Delete: Click “Delete” and confirm.
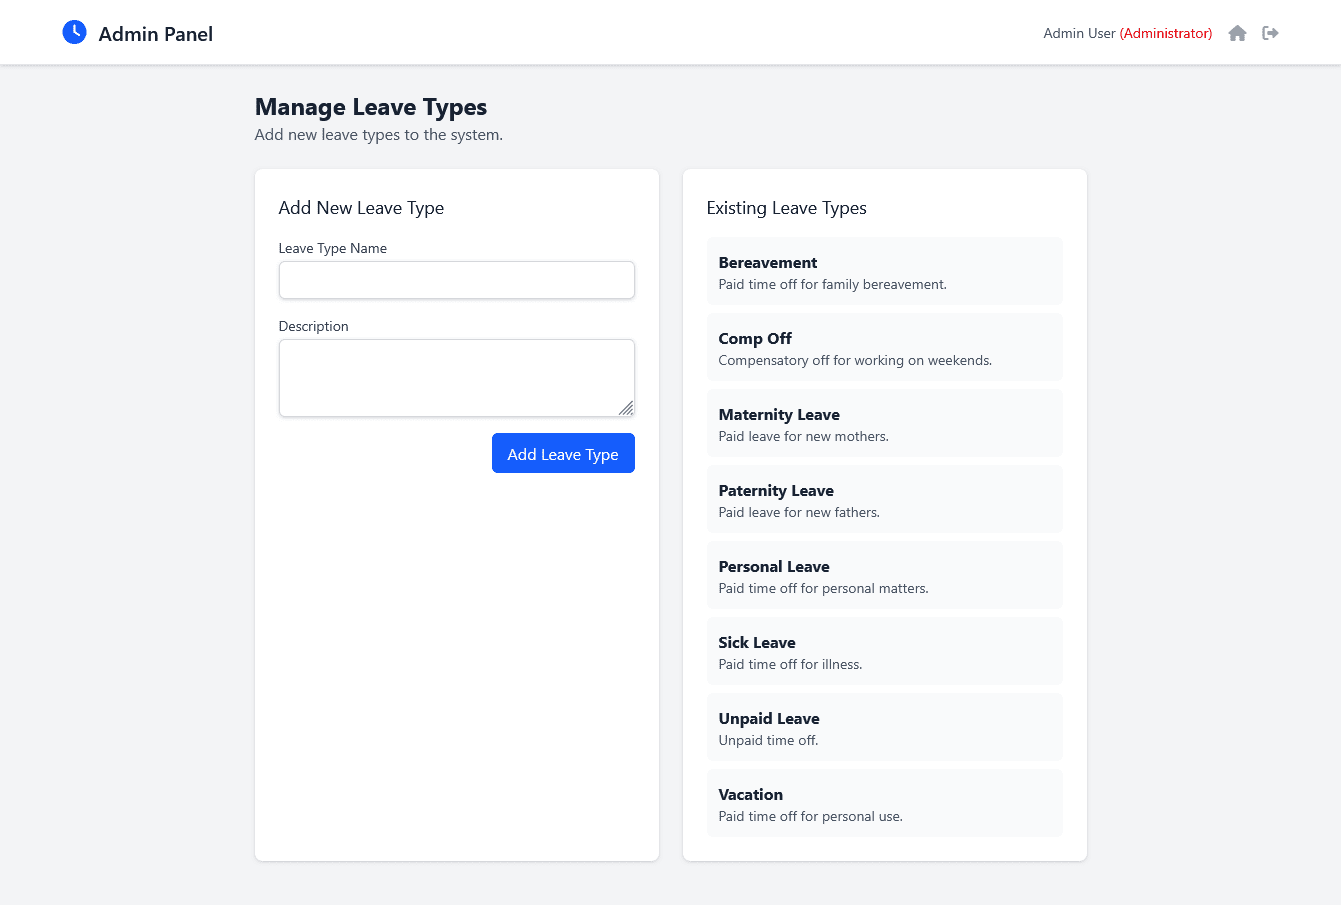
2.7. Leave Types
Define different categories of leave (e.g., Vacation, Sick, Personal).
-
Click “Manage Leave Types” in the Admin Panel.
-
Add: Click “Add New,” enter name and description, then “Save.”
-
Leave Types once created cannot be Edited or Deleted.
Default Leave Types:
By default, 7 types of leave are added when a new account is provisioned: Bereavement, Maternity, Paternity, Personal, Sick, Unpaid, Vacation. Admins can add more types of leave as per their org policy.
Leave Types not Editable/Removable:
The different types of leave serve as a dictionary item to setup Leave Configuration for different employee levels in the Organization. It’s up to Admins to whether utilize the added leave types while creating a Leave Configuration or not.
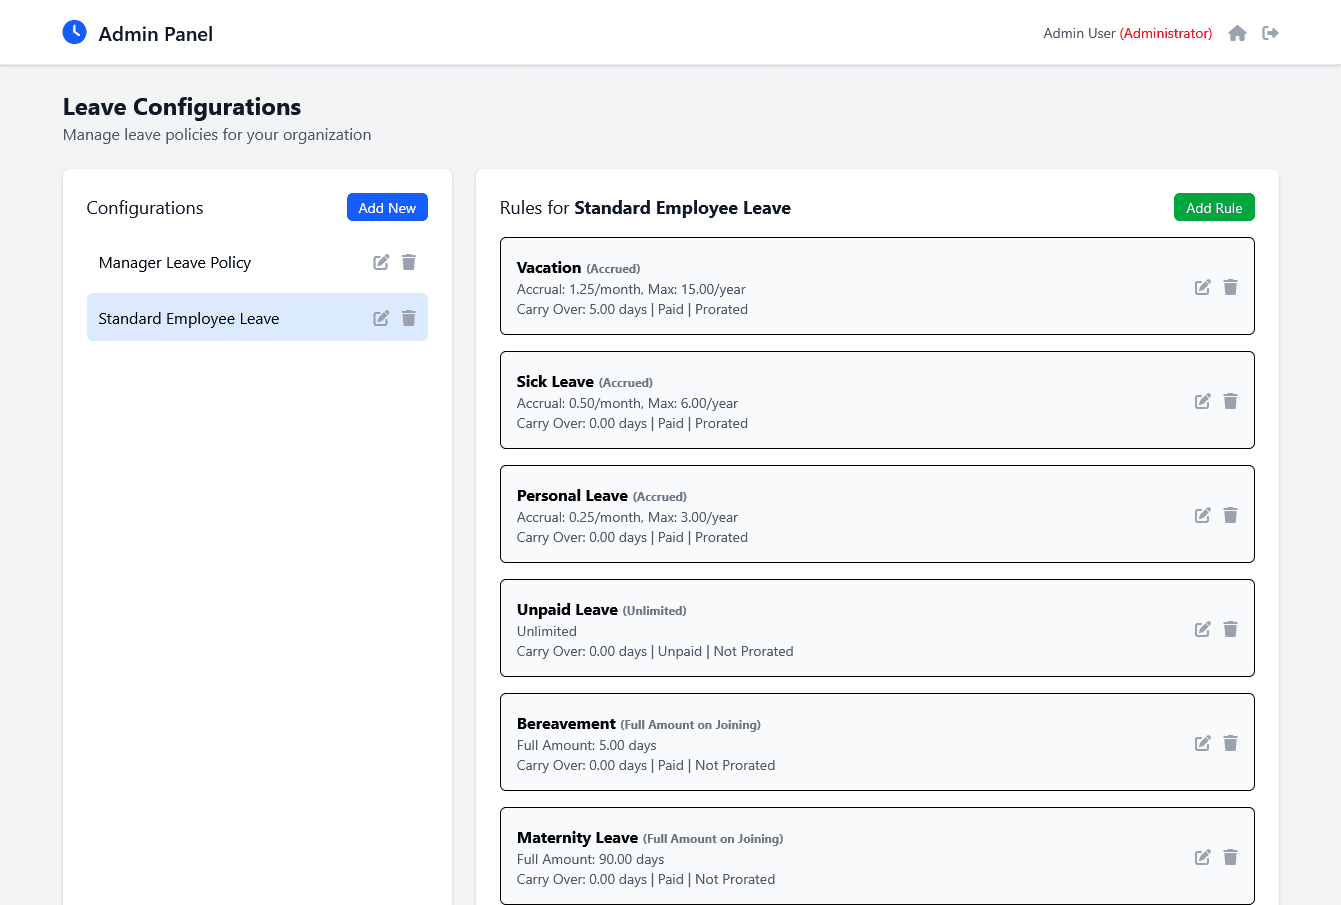
2.8. Leave Configurations
Set up detailed rules for how leave accrues and is managed for different employee groups.
-
Click “Leave Configurations” in the Admin Panel.
-
Add Configuration:
-
Click “Add New,” enter name and description, then “Save.”
-
-
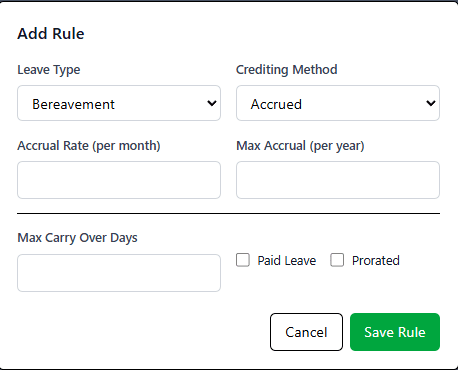
Add Rule:
-
With configuration selected, click “Add Rule.”
-
Choose options, enter necessary values, and click “Save Rule.”
-
-
Edit/Delete: Click beside the rule to modify or remove.
-
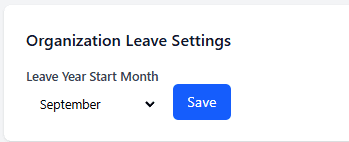
Set “Leave Year Start Month” as needed.
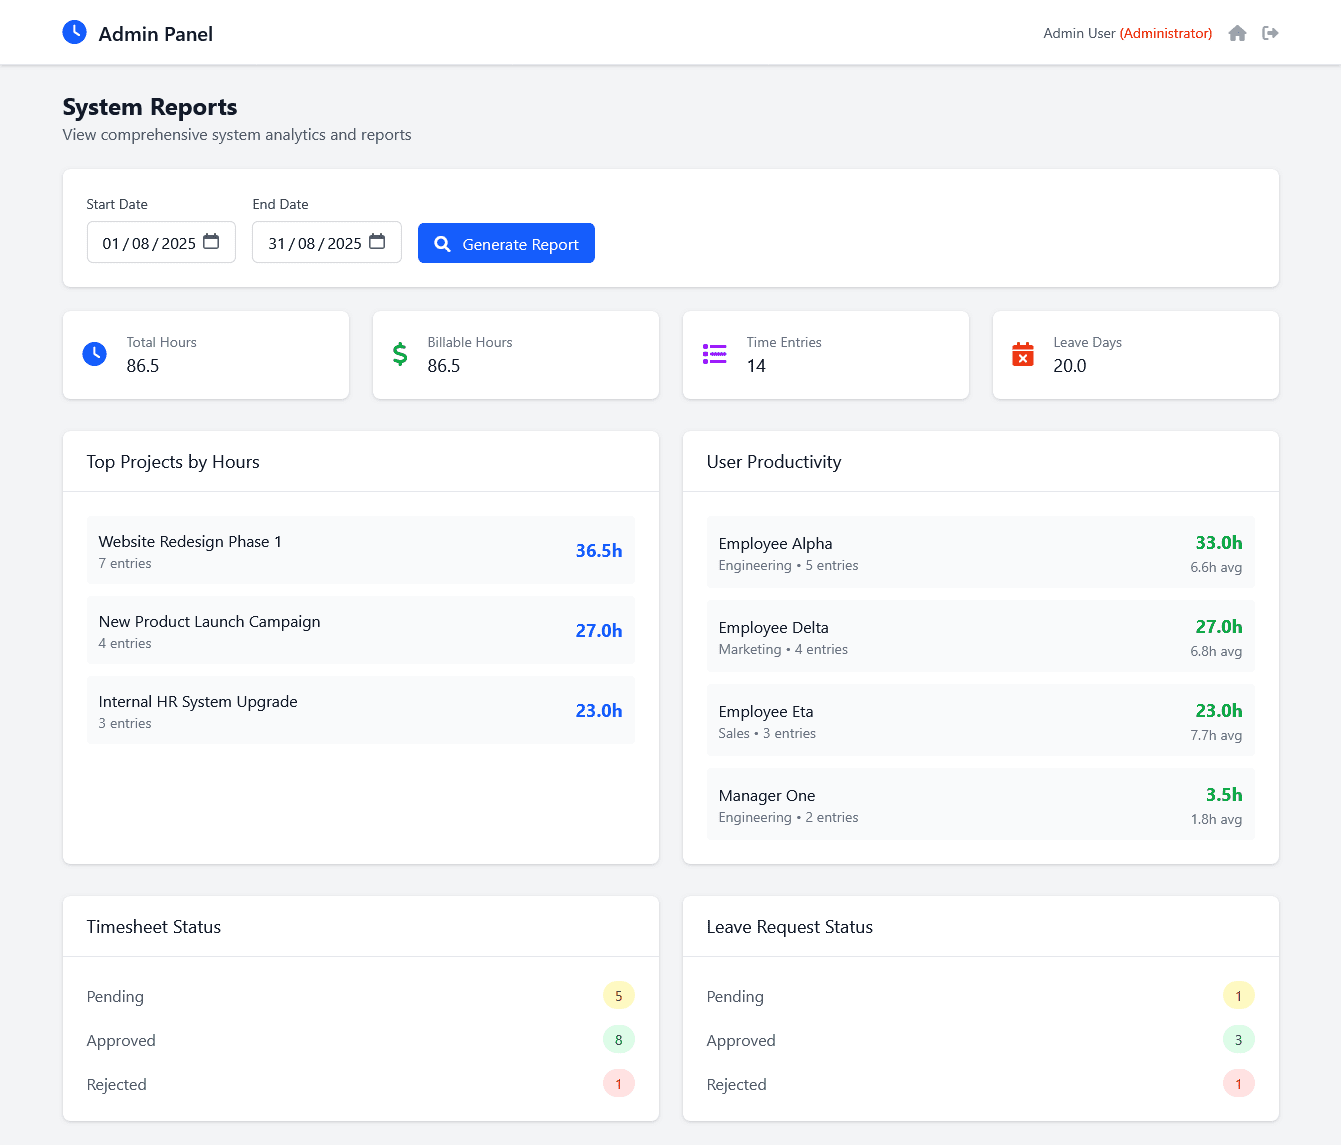
2.9. System Reports (Admin)
Generate and view various reports on time entries, leave, projects, and user productivity.
-
Click “Reports” in the Admin Panel.
-
Define date range and click “Generate Report.”
-
Review summaries and detailed breakdowns.
Plan Restriction:
Starter Plan: Reports will only display data for the last 90 days, even if a wider date range is selected.
Trial or Stable Plan: Full historical data is available for reporting.
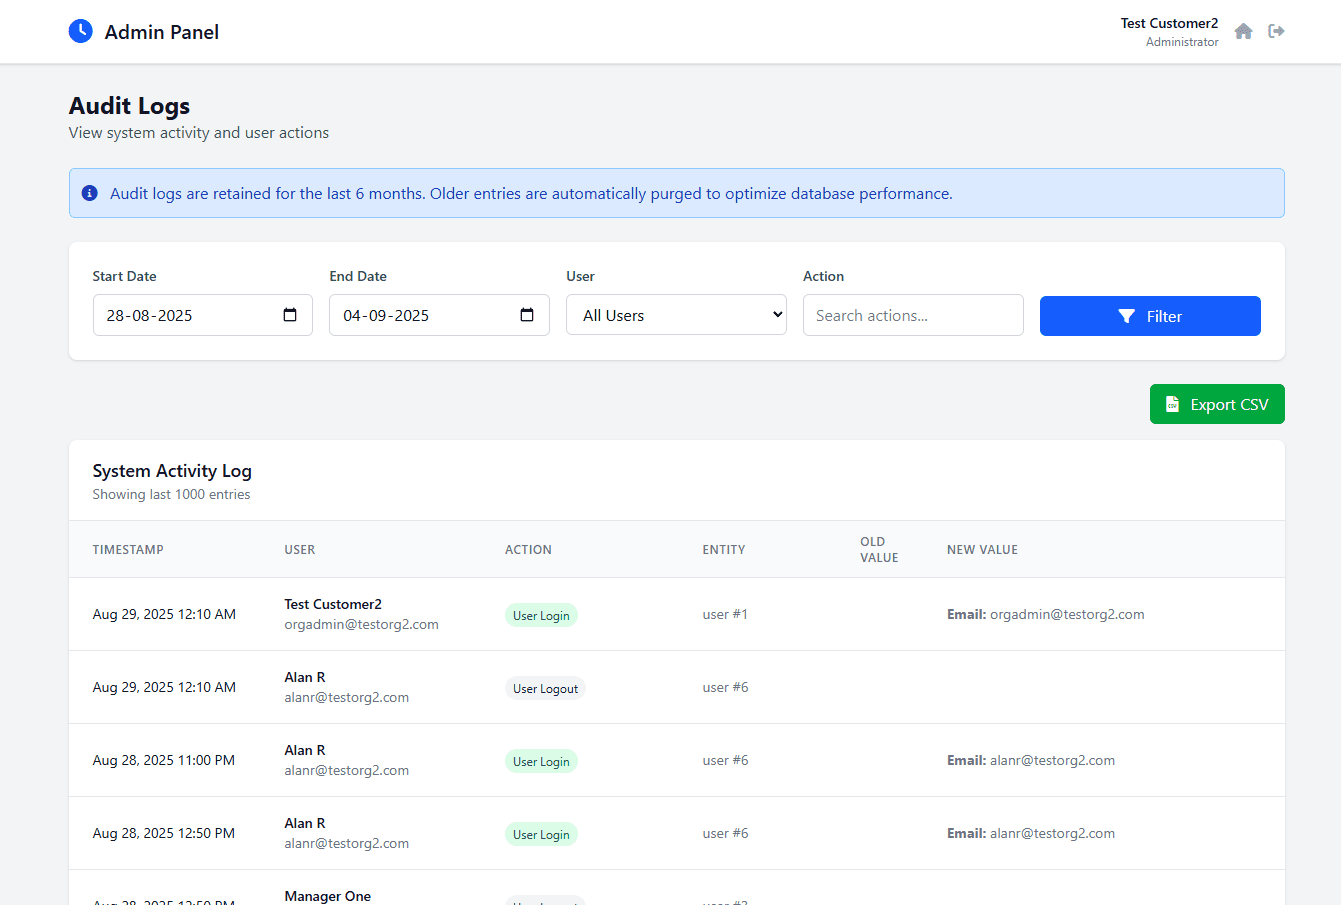
2.10. Audit Logs
Monitor all system activities and user actions for compliance and security.
-
Click “Audit Logs” in the Admin Panel.
-
Use filters to refine logs; export data via “Export CSV.”
Plan Restriction:
Starter Plan: Audit Logs not available. A message will inform you that this is a premium feature and prompt you to upgrade.
Trial or Stable Plan: Full access to detailed audit logs. Audit logs are retained for the last 6 months. For e.g. if current month is August 2025, then Audit logs will be available starting from 1st February 2025 till today’s date. Older entries are automatically purged to optimize database performance.
3. Manager Documentation (Manager Role)
As a Manager, you can oversee your team’s time entries, leave requests, and manage projects/tasks relevant to your team.
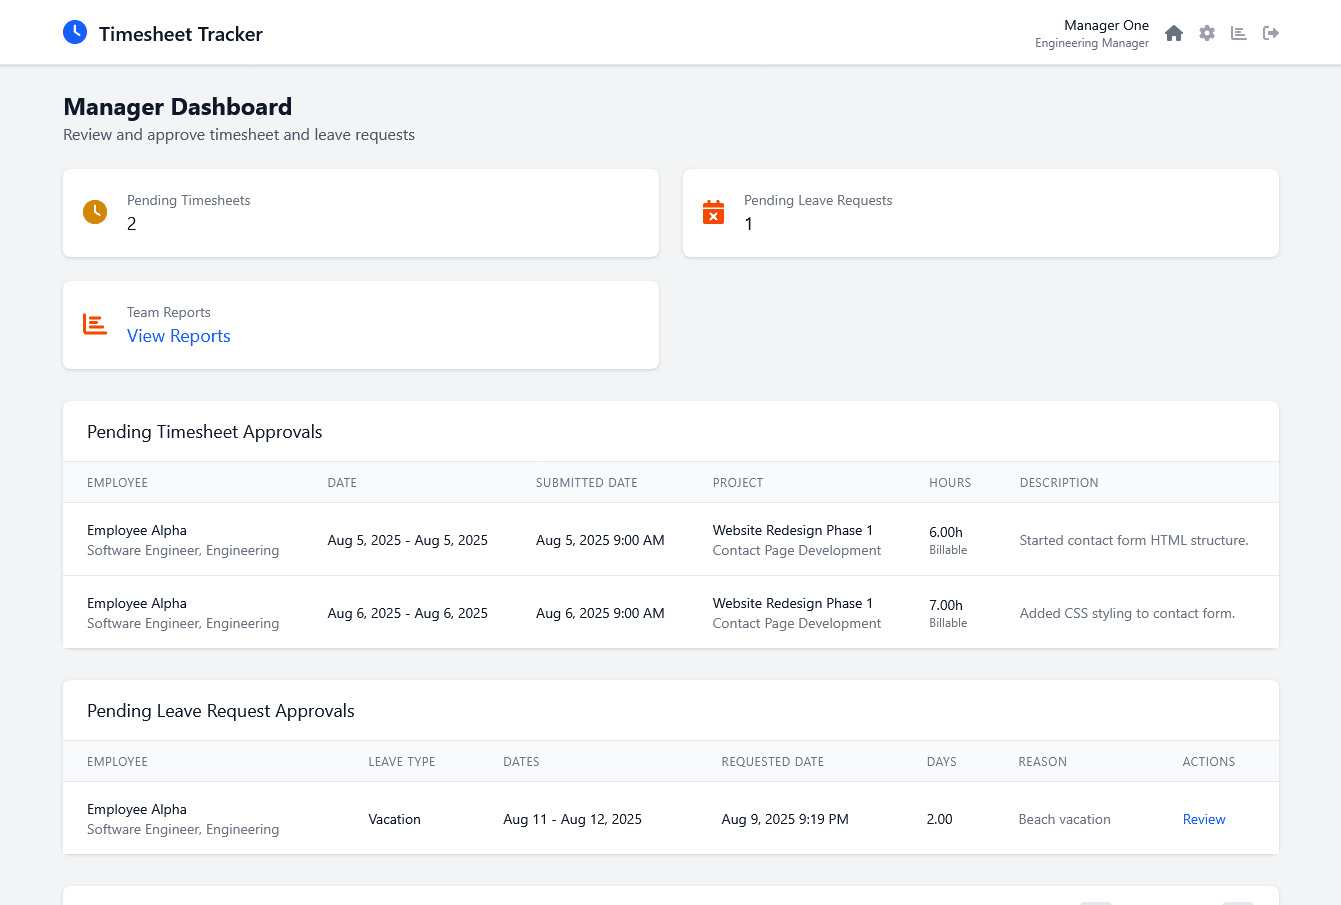
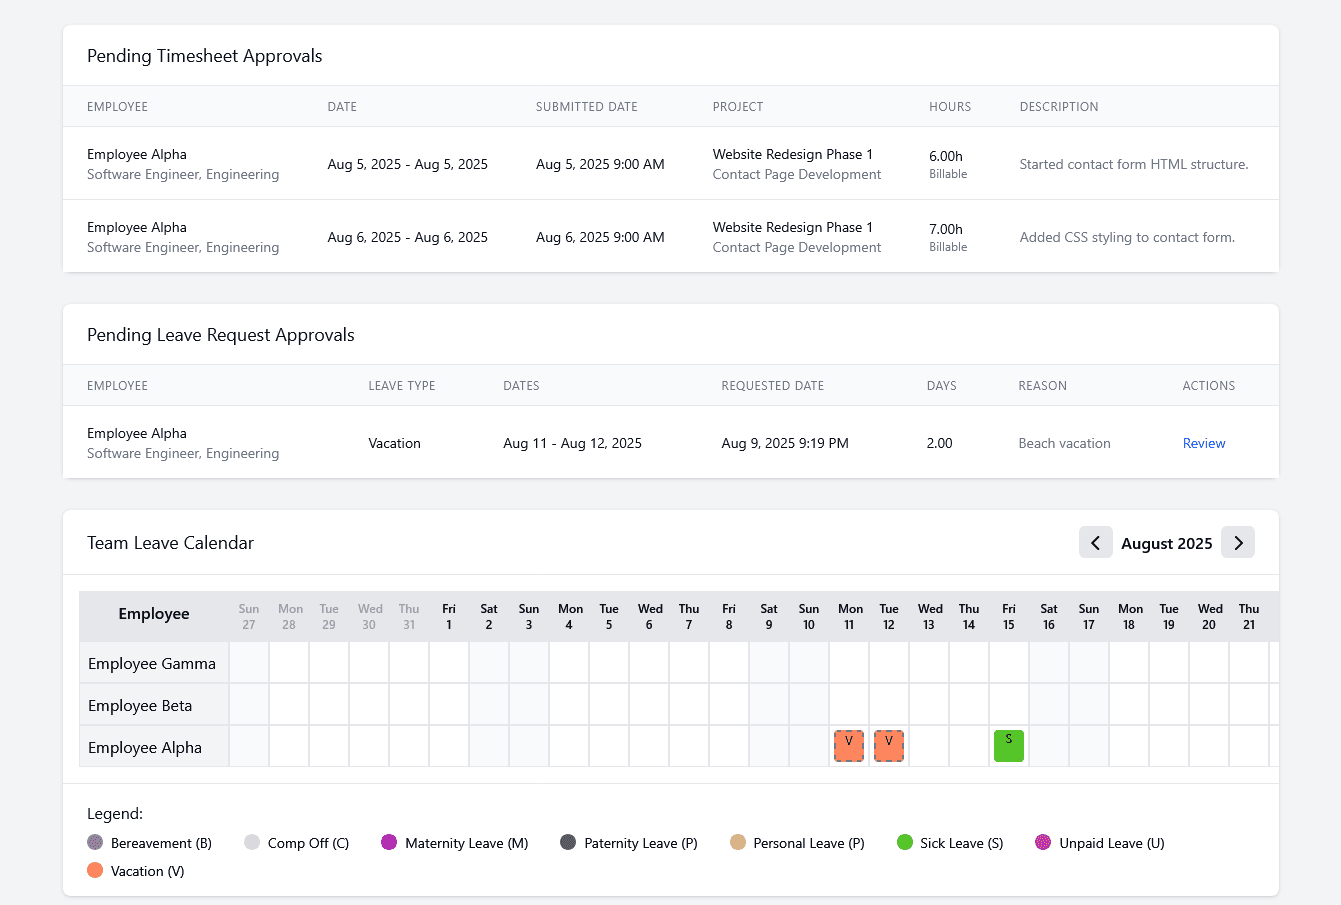
3.1. Manager Dashboard Overview
The Manager Dashboard provides a centralized view of your team’s activities and pending approvals.
- View pending timesheets, leave requests, and team leave calendar.
3.2. Pending Timesheet Approvals under Team Management
Review and approve/reject timesheets submitted by your direct and indirect reports.
-
Navigate to “Pending Timesheet Approvals” section.
-
Approve or reject timesheets, adding comments if prompted.
3.3. Pending Leave Request Approvals under Team Management
Review and approve/reject leave requests from your direct and indirect reports.
-
Navigate to “Pending Leave Request Approvals” section.
-
Approve or reject requests with optional comments.
Plan Restriction:
Starter Plan: Team Leave Calendar view not available.
Trial or Stable Plan: Team Leave Calendar view available.
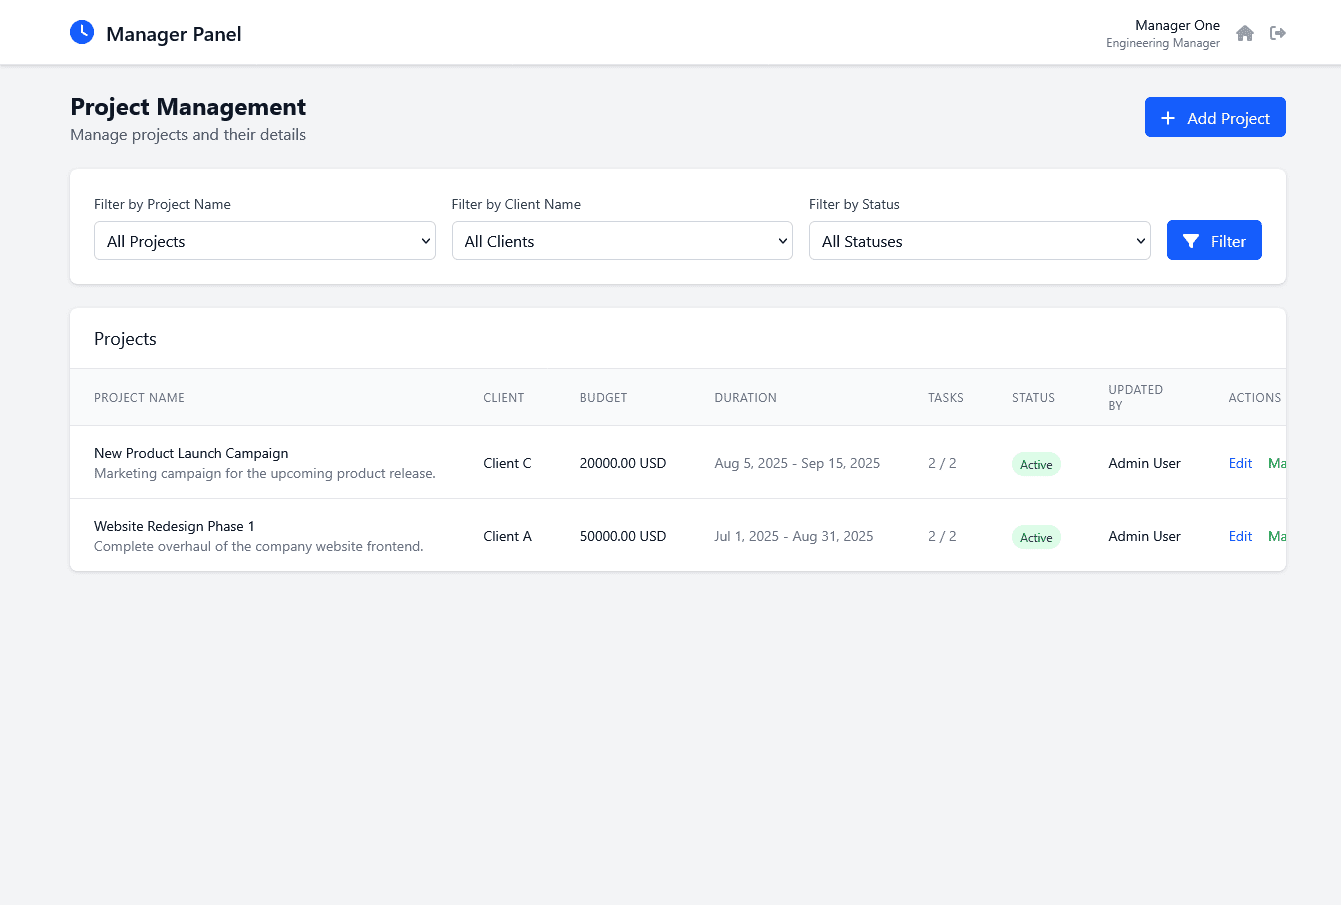
3.4. Project Management (Manager Panel)
Manage projects that you are assigned as a manager or unassigned projects. Projects created by Manager will only be visible to employee reporting directly to them. Projects which are not created by you will be available as read-only.
-
Click “Project Management” in the manager’s dashboard.
-
Add Project: Enter details, click “Create Project.”
-
Edit Project: Modify details and save.
-
Manage Tasks: Click “Manage Tasks” to add tasks associated to a project.
Plan Restriction:
Starter Plan: Limited to 5 active projects. The “Add Project” button will be disabled if the limit is reached.
Trial or Stable Plan: Unlimited active projects.
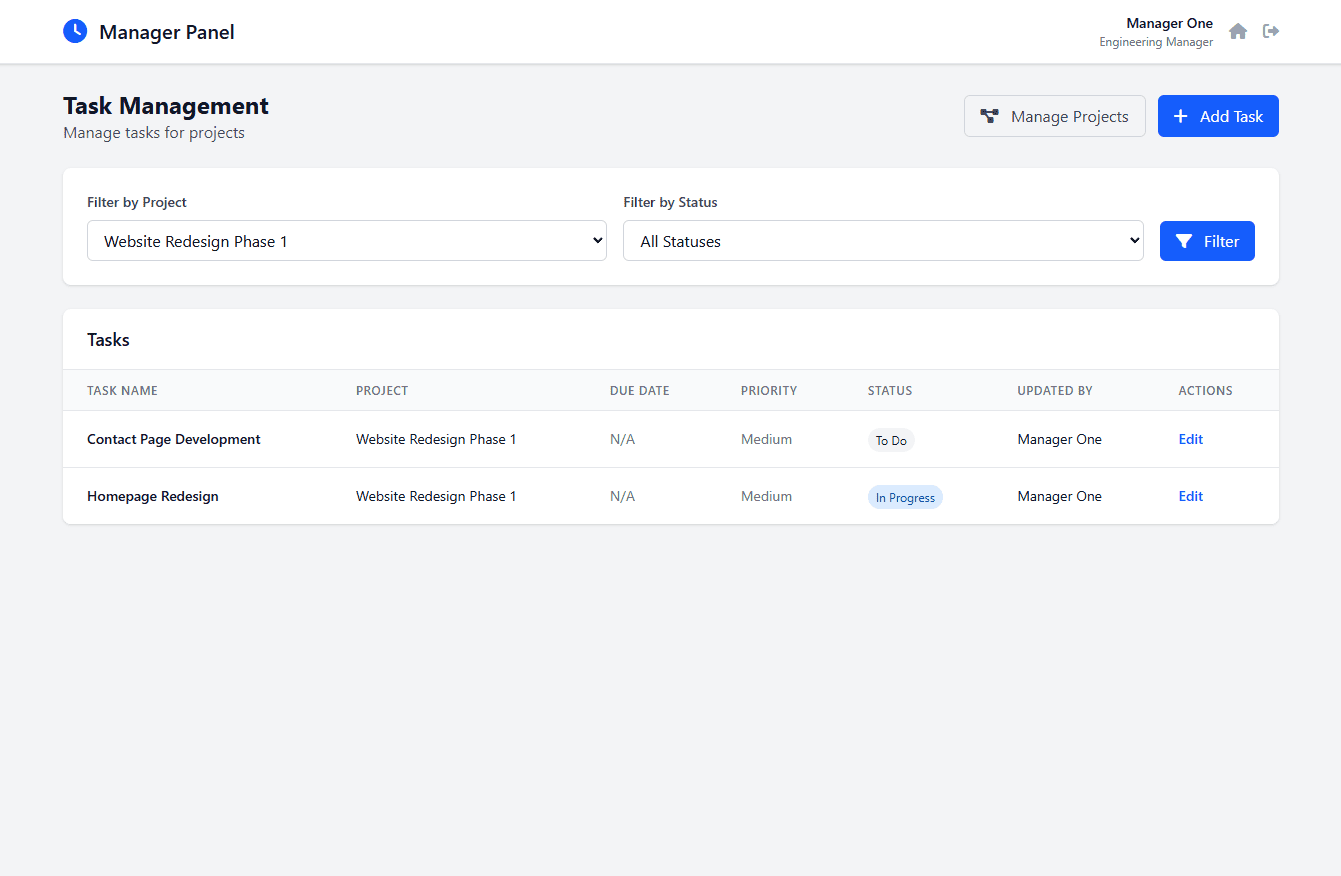
3.5. Task Management (Manager Panel)
Manage tasks within projects you oversee. Tasks created within a project by a Manager will only be visible to employee reporting directly to them. Tasks which are not created by you will be available as read-only.
-
Click “Task Management” in the sidebar.
-
Add Task: Select project, provide details, and click “Create Task.”
-
Edit Task: Modify and save.
Plan Restriction:
Starter Plan: Limited to 15 active tasks. The “Add Task” button will be disabled if the limit is reached.
Trial or Stable Plan: Unlimited active tasks.
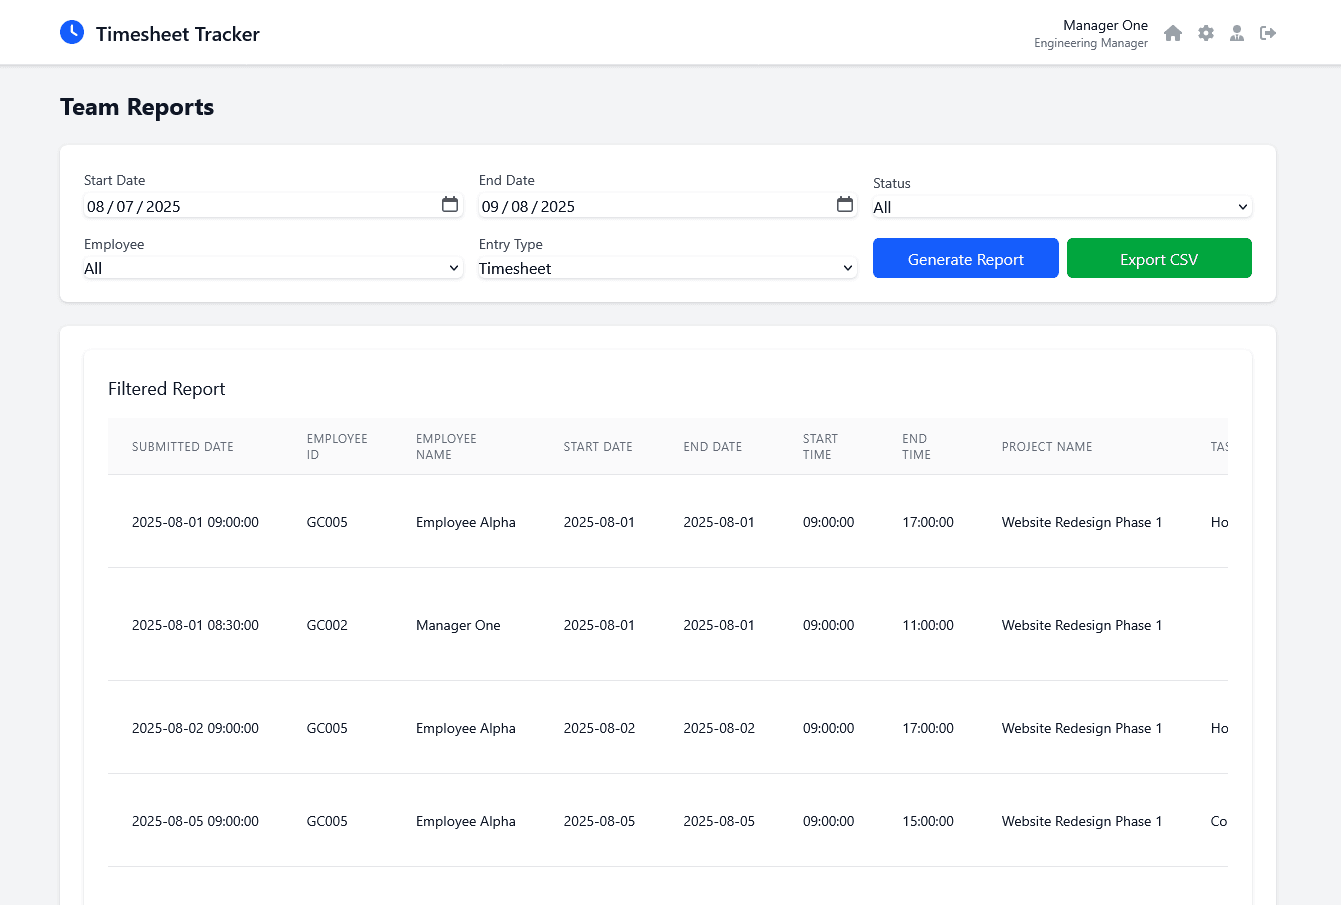
3.6. Team Reports
Access reports specific to your team’s performance.
-
Click “Team Management” and then click on “View Reports.”
-
Select date range and filter by employee or status.
-
Review or Export report data.
Plan Restriction:
Starter Plan: Export to CSV feature not available.
Trial or Stable Plan: Export to CSV feature available for detailed analysis.